- Published on
Setting Up Jekyll Locally with Ruby and Bundler
- Authors

- Name
- hwahyeon
Setting up Jekyll locally to build and preview a site is a straightforward process.
1. Installing Ruby
Linux
On Linux, you can easily install Ruby using the following command:
sudo apt-get install ruby-full
Windows
On Windows, download and install RubyInstaller. Choose the appropriate version from the website and proceed with the installation.
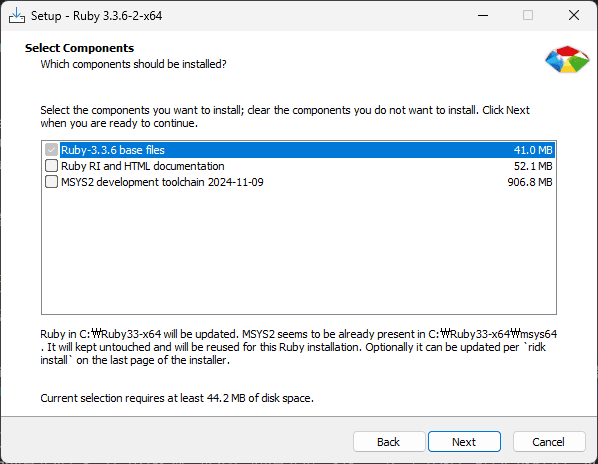
During the installation, you'll encounter two options. It is recommended to install both options.

Ruby RI and HTML Documentation
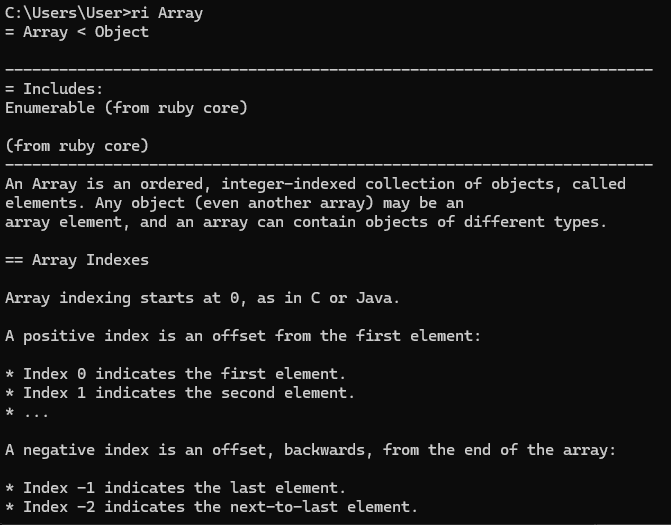
- Ruby RI: A CLI-based documentation tool for Ruby's standard library and methods. After installation, you can use the
ricommand to view documentation.
ri Array
Array class in Ruby. 
▲ This picture is displayed when you run the command ri Array.
- HTML Documentation: If you select this option during installation, documentation files will be created and stored in the
doc/orshare/doc/rubydirectory of the Ruby installation path.
MSYS2 Development toolchain
The MSYS2 Development Toolchain provides a Unix-like development environment on Windows. It includes C/C++ compilers and build tools required by languages like Ruby.
- When You Need It: Some RubyGems (e.g.,
nokogiri,json,eventmachine) require compiling C/C++ extensions during installation. Without MSYS2, you may encounter an error like this:
ERROR: Failed to build gem native extension.
How to Install the MSYS2 Development Toolchain
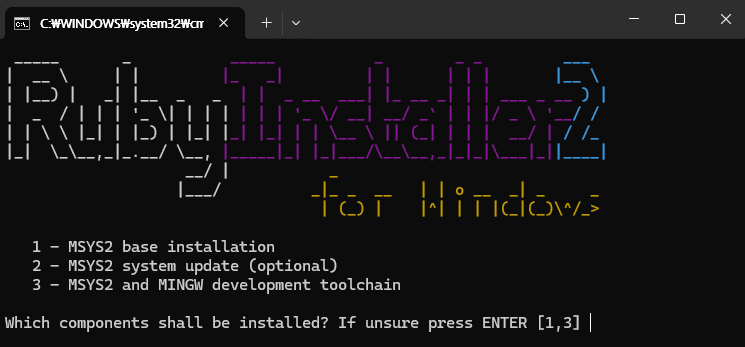
If you select the option to install the MSYS2 Development Toolchain during RubyInstaller setup, the installer will ask: "Run 'ridk install' to set up MSYS2 and the development toolchain. MSYS2 is required to install gems with C extensions."

- MSYS2 base installation
- MSYS2 system update
- MSYS2 and MINGW development toolchain
It is recommended to select options 1 and 3 to ensure proper setup for gems with native extensions.
3. Installing Jekyll and Bundler
Jekyll is a static site generator built on Ruby, and Bundler manages project dependencies. Both are required for setting up and managing your Jekyll site.
Installation
gem install jekyll bundler
Verification
After installation, check the installed versions by running the following commands:
ruby -v
bundler -v
If the versions are displayed in the command line, it means both are installed correctly.
4. Installing Dependencies for a Project
To install the dependencies for a Jekyll project, navigate to the project directory and run the following command:
bundle install
5. Running the Jekyll Server
To run the Jekyll server and preview the site locally, execute.
bundle exec jekyll serve
Once the server is running, open http://localhost:4000 in your browser to view the site.